

In the sprawling, time-bending world of The Adventures of Elliot: The Millennium Tales, success is measured by more than just the defeat of final bosses or the completion of main quests. For players aiming to fully optimize Elliot’s survivability, the hunt for "Shards of Life" is an essential pillar of the gameplay experience. These small, crystalline red fragments are not merely collectibles; they are the fundamental building blocks of Elliot’s physical resilience.

Much like the iconic heart pieces found in classic action-adventure titles, Shards of Life function as an incremental upgrade system. By gathering these shards, players can effectively extend their health bar, turning a fragile protagonist into a formidable force capable of surviving the most punishing encounters. This guide breaks down the mechanics of health progression, the strategic importance of these items, and provides a comprehensive, age-by-age roadmap to locating every single shard scattered throughout the game.
The Mechanics of Resilience: Understanding the Tear System
At its core, The Adventures of Elliot utilizes a unique health management system centered on the concept of "Tears." A single Tear serves as a primary unit of health. To forge one complete Tear, a player must locate and secure four individual Shards of Life.
The game imposes a hard cap of 20 Tears, meaning that to reach the absolute maximum health capacity, players must embark on a completionist journey to find a total of 60 Shards of Life. This progression system is designed to reward thorough exploration. While the main campaign may guide you through various biomes, the most elusive shards are often tucked away behind environmental puzzles, hidden shortcuts, or areas that require specific late-game abilities to access.
Why You Should Prioritize Shards
It is a common mistake for newcomers to focus exclusively on offensive upgrades or narrative progression. However, as the difficulty spikes in the later stages—particularly in the Age of Magic and the Age of Budding—the damage output of enemies can become overwhelming. Investing time in "Shard runs" early in each age provides a safety net that allows for more experimental playstyles and a higher margin for error during boss fights.

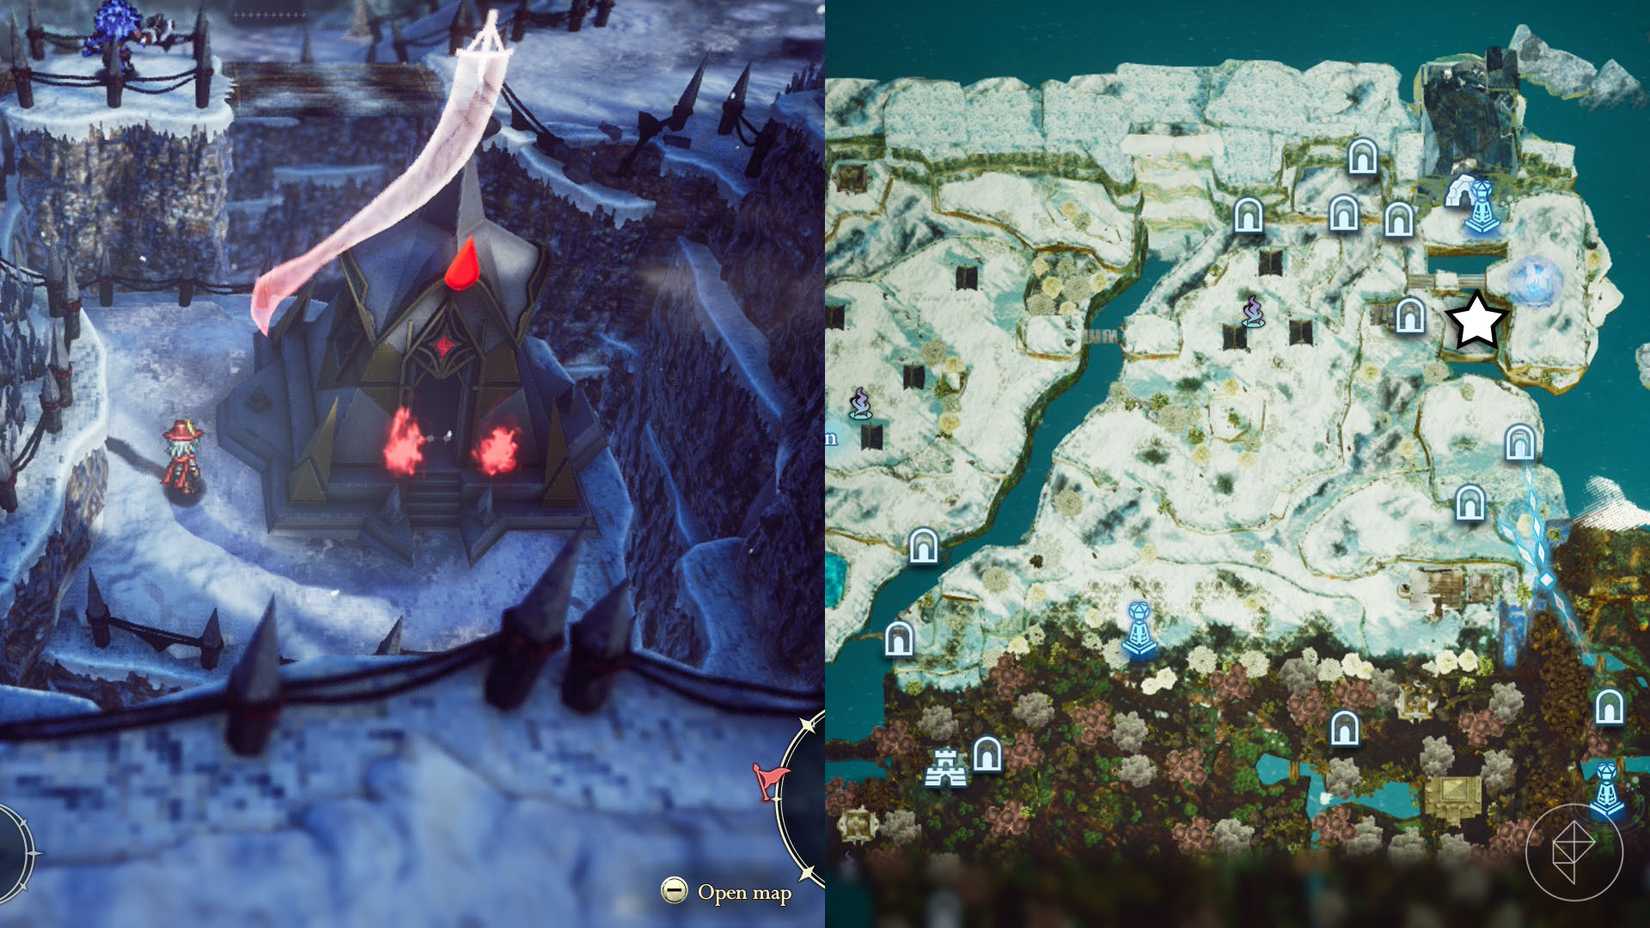
Chronological Breakdown: Mapping the Shards
To simplify the navigation of the game’s vast world, we have categorized the locations by the game’s distinct ages. Please note that while some shards are accessible immediately, others are locked behind skill gates, such as the Bomb, Hammer, or Dive abilities.
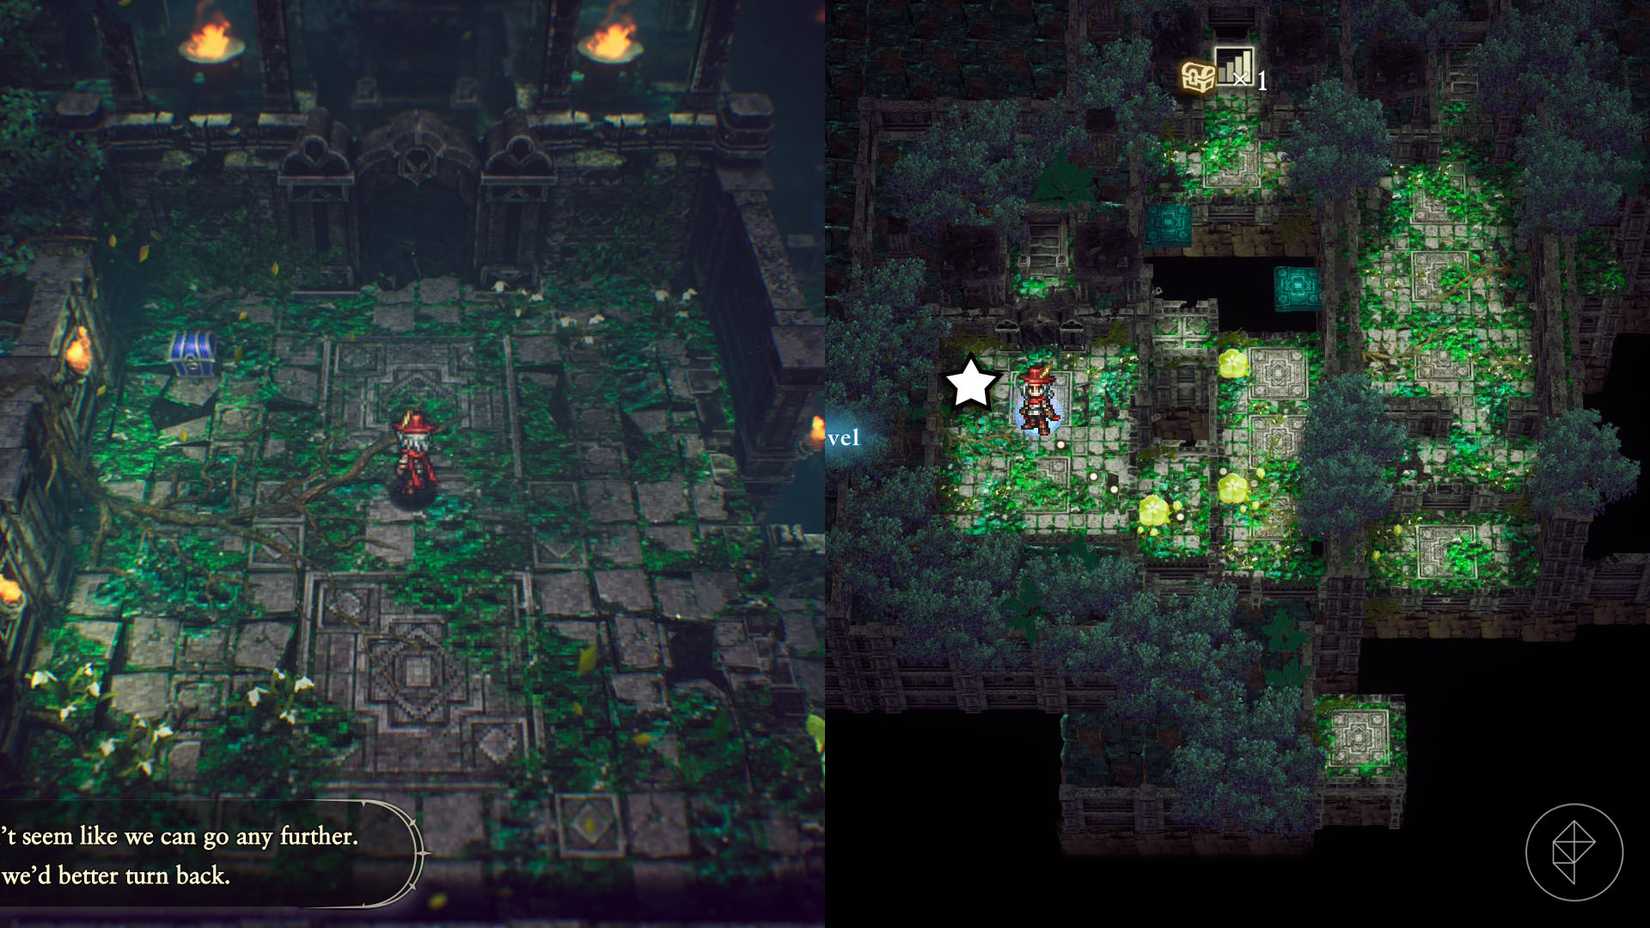
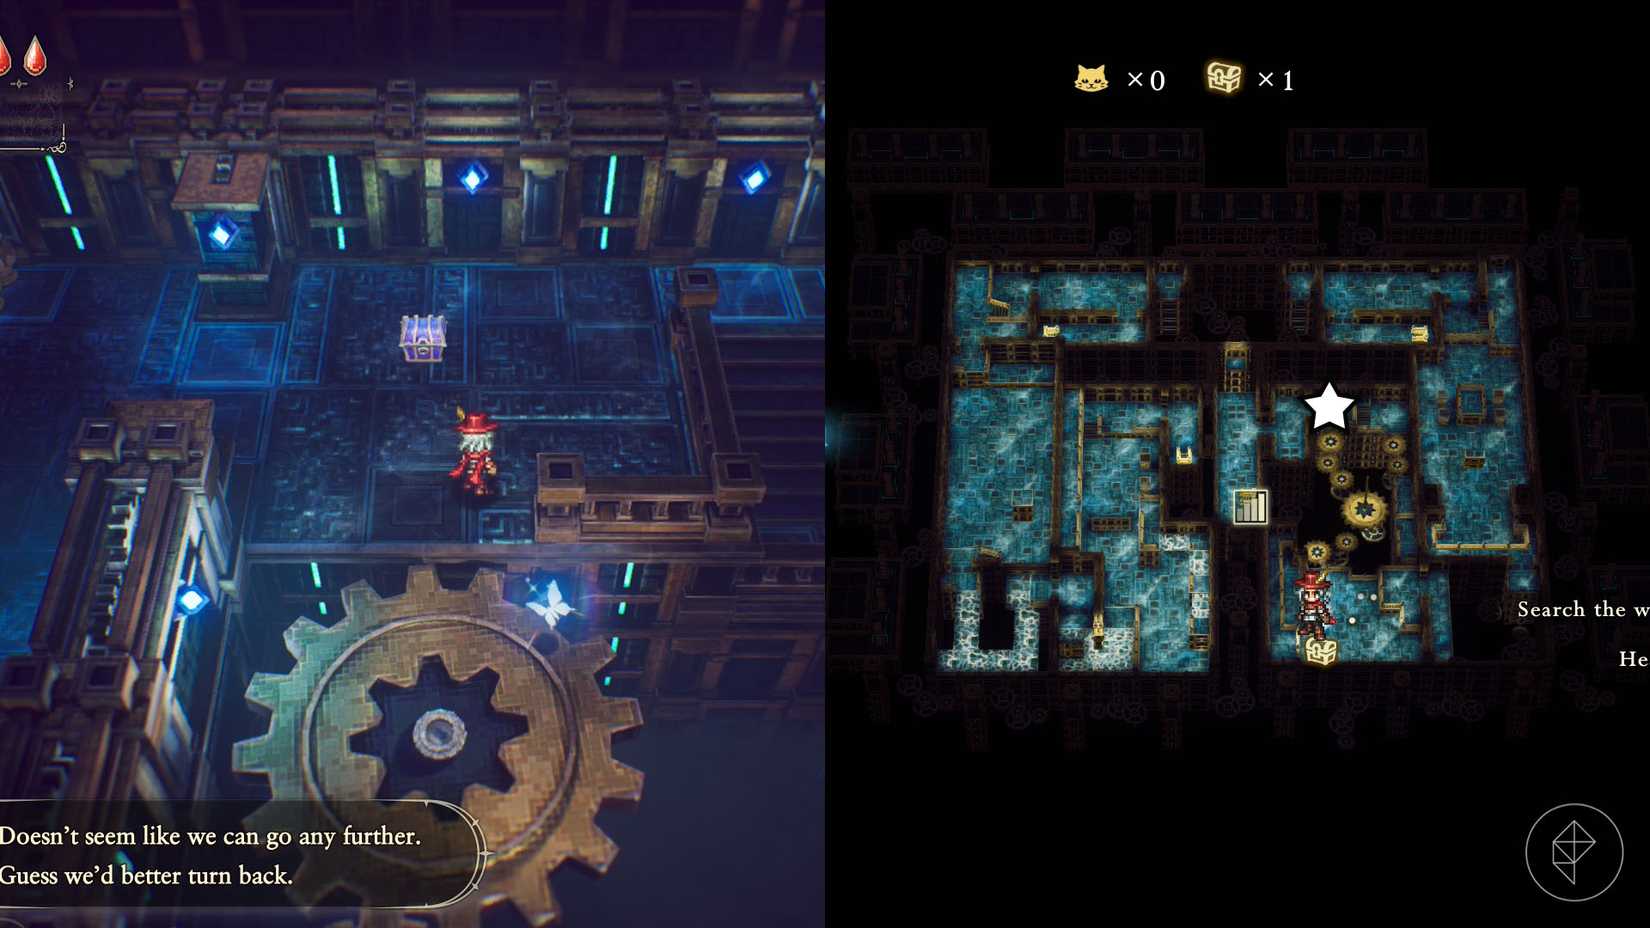
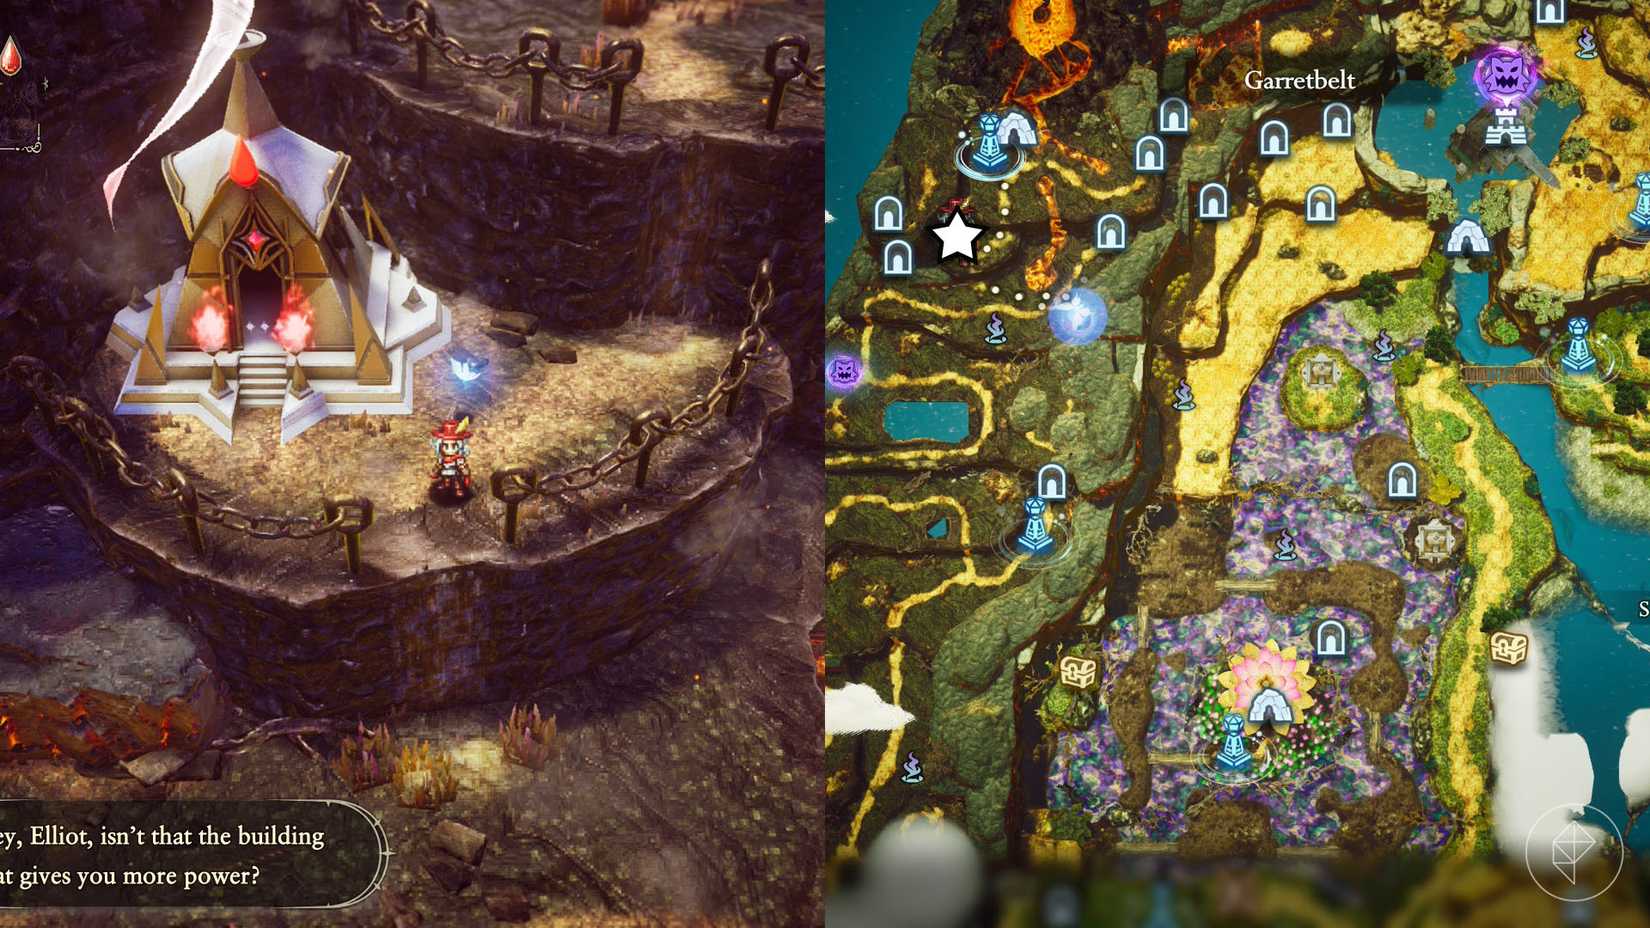
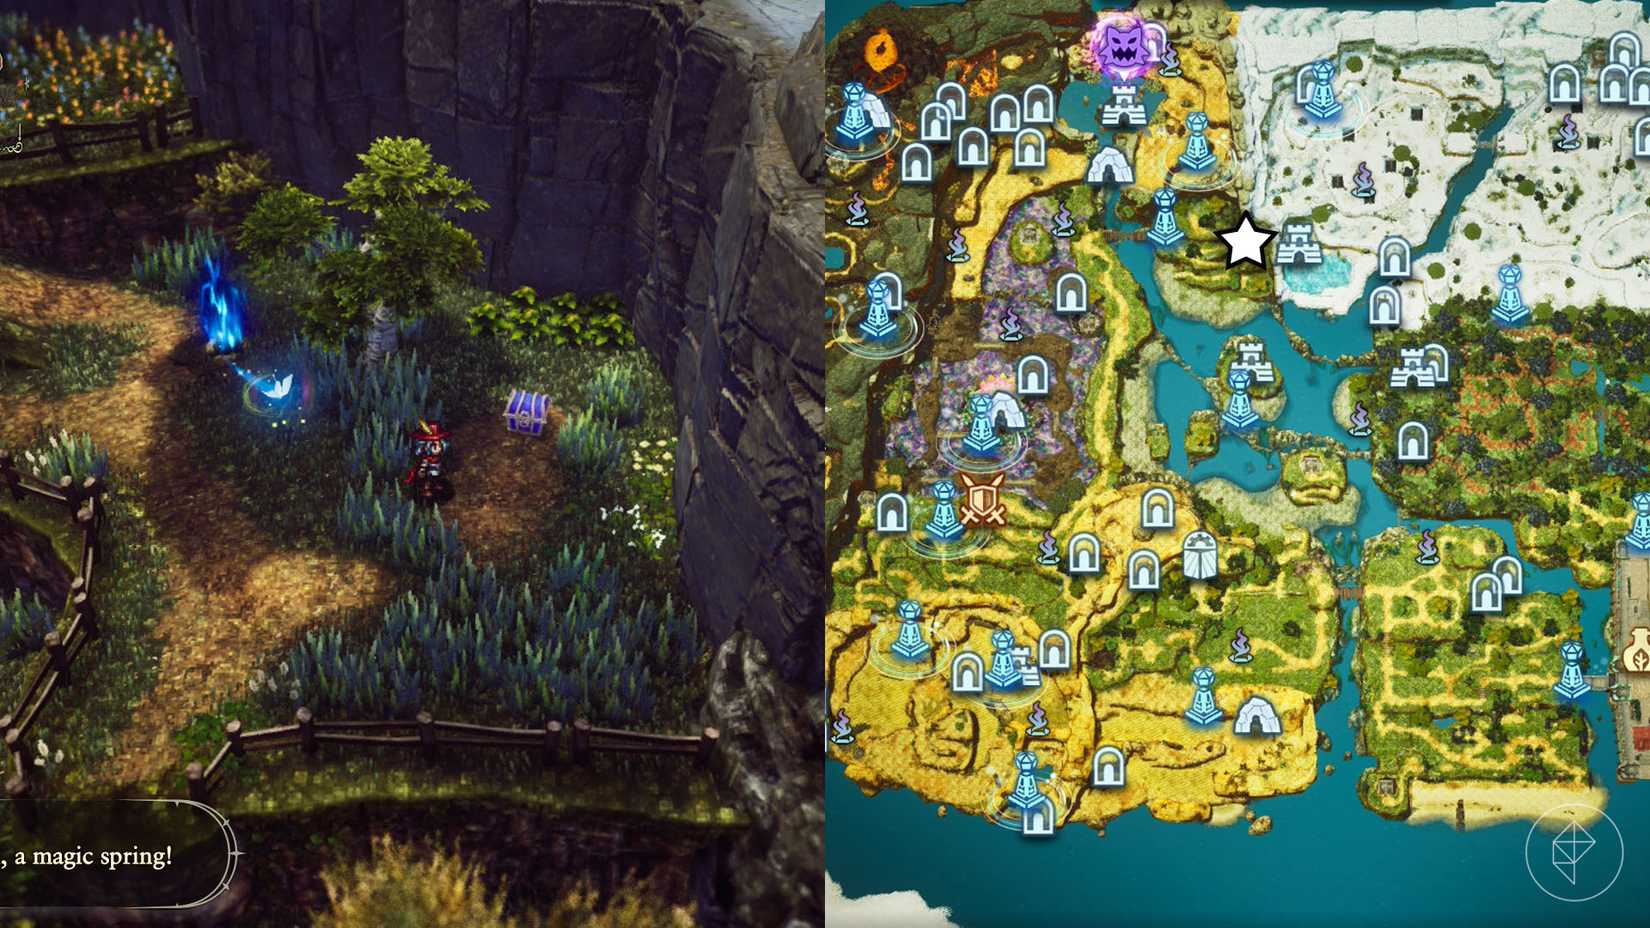
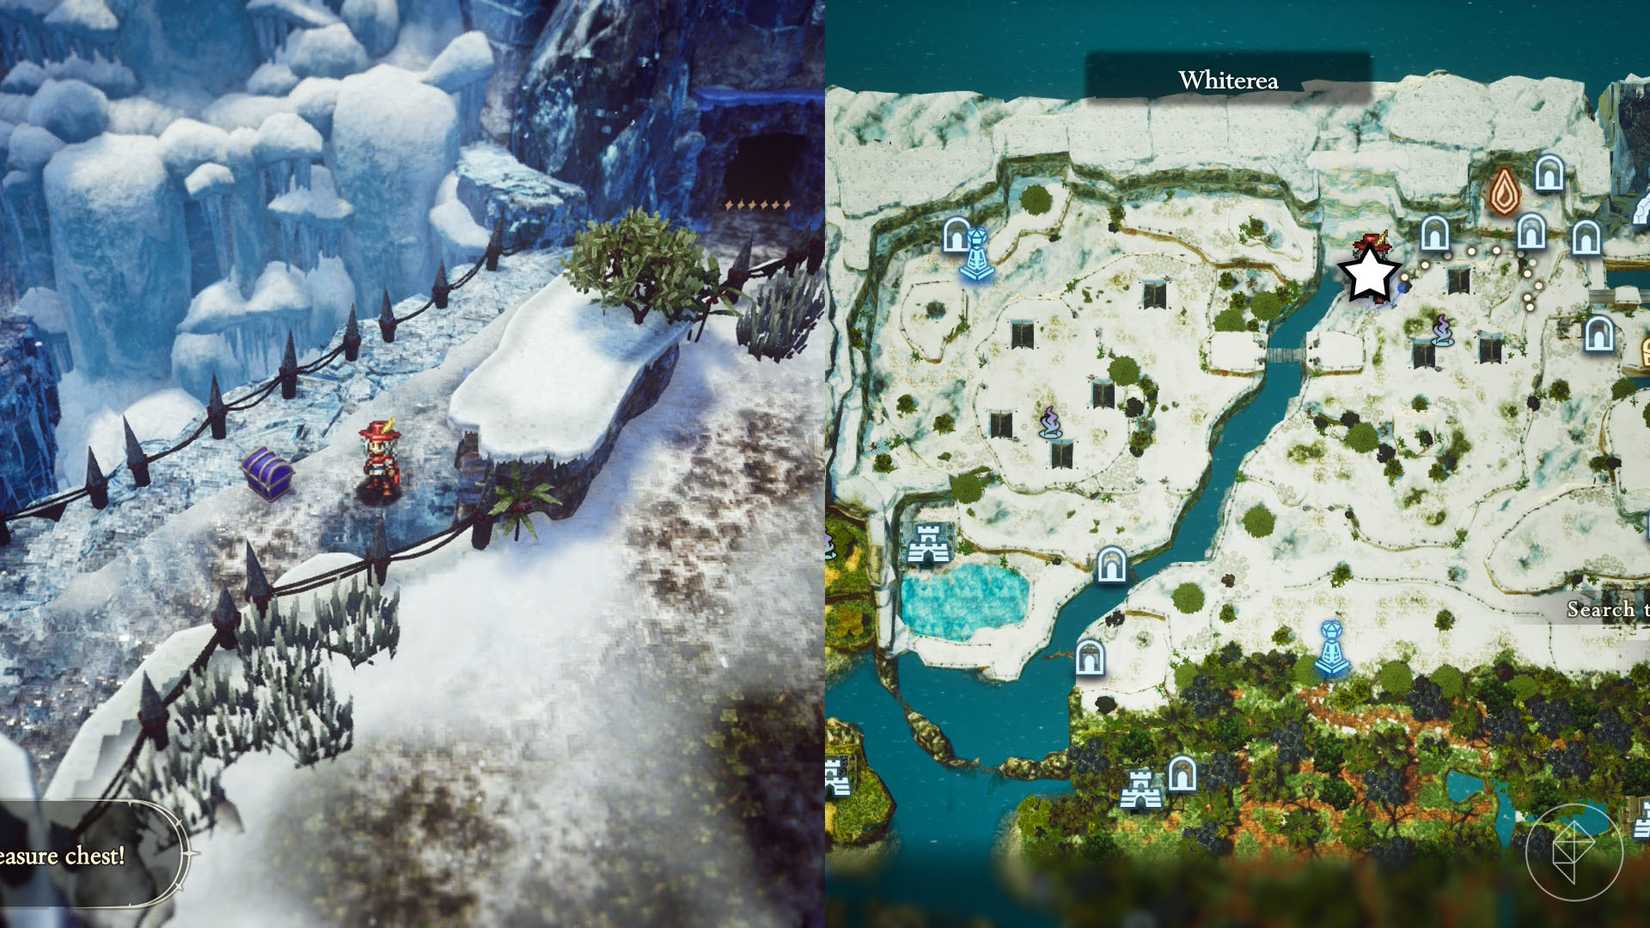
I. The Age of Safekeeping (16 Shards)
The Age of Safekeeping acts as the foundation of your journey. There are 16 shards here, and while the terrain is relatively forgiving, players should revisit these maps once they have unlocked bombs or advanced traversal skills.
| Map | Location | Description |
|---|---|---|
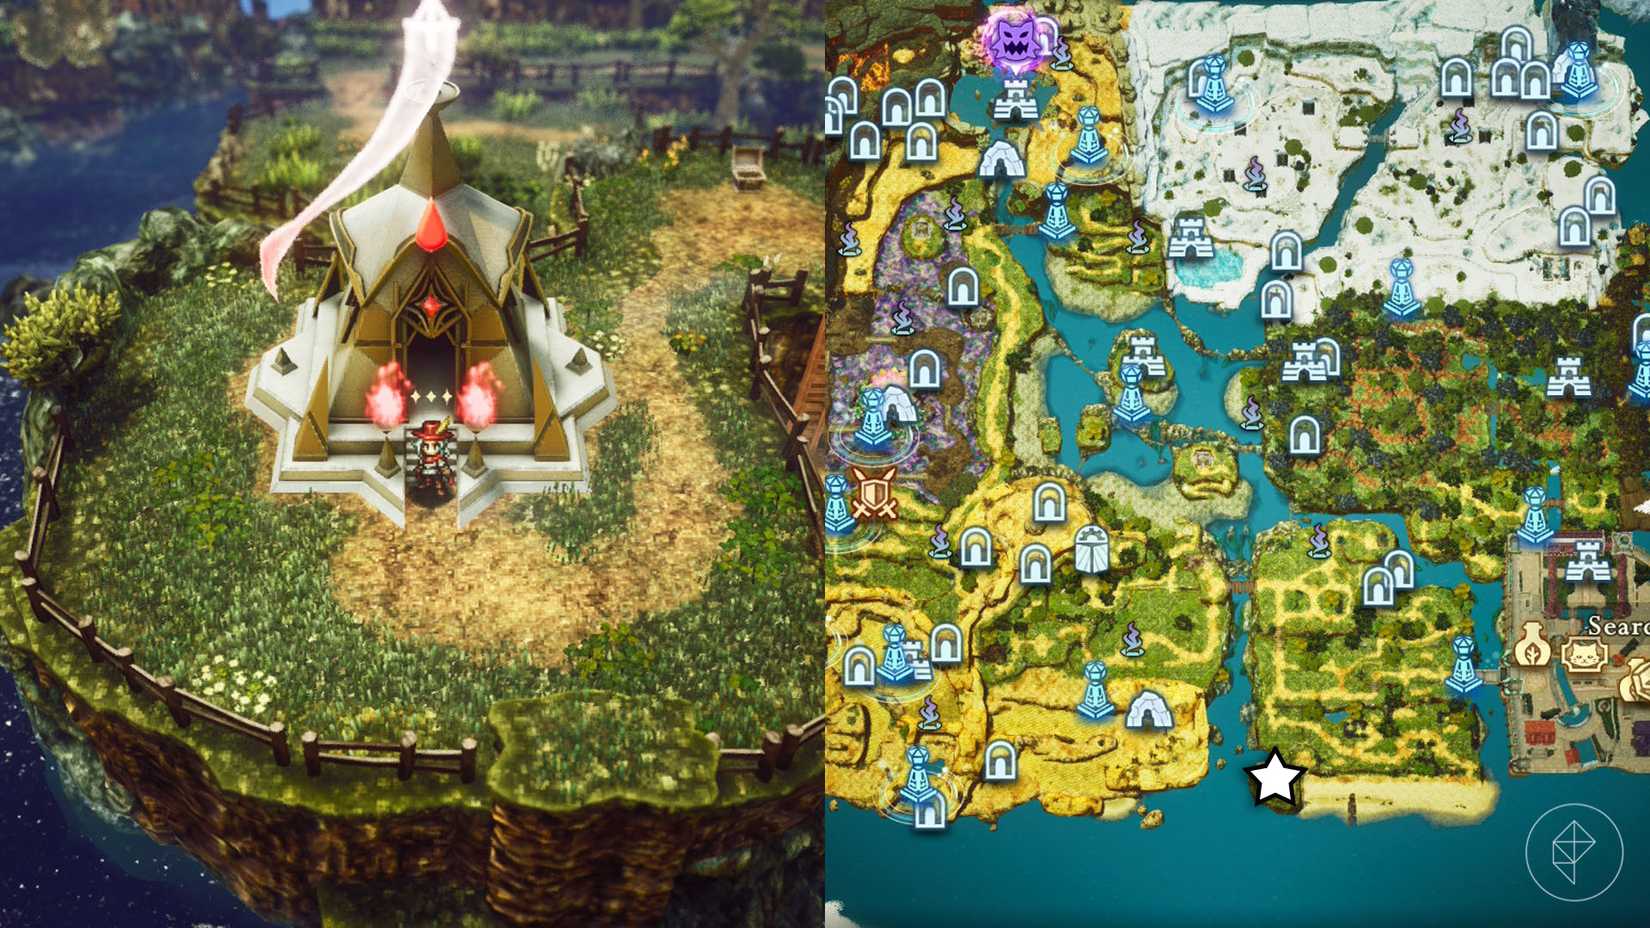
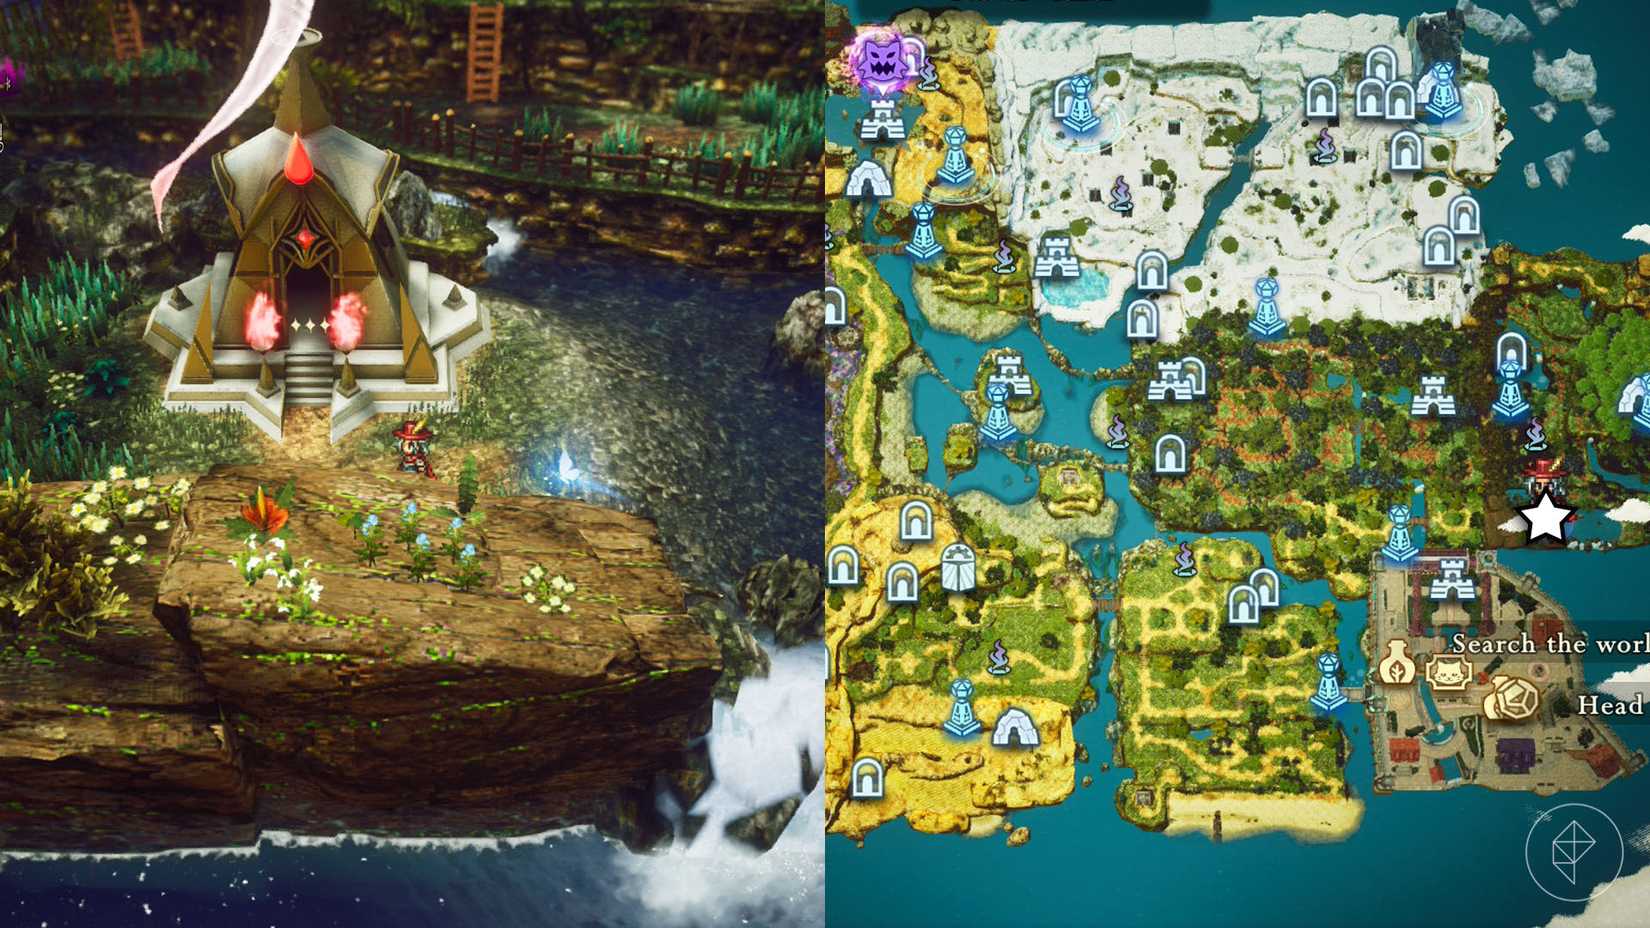
| Eastern Fields of Flon | Shrine of Life 1 | Located on the southwestern perimeter. |
| Western Fields of Flon | Blue Chest | Near the locked door behind a tree, accessible via the upper path. |
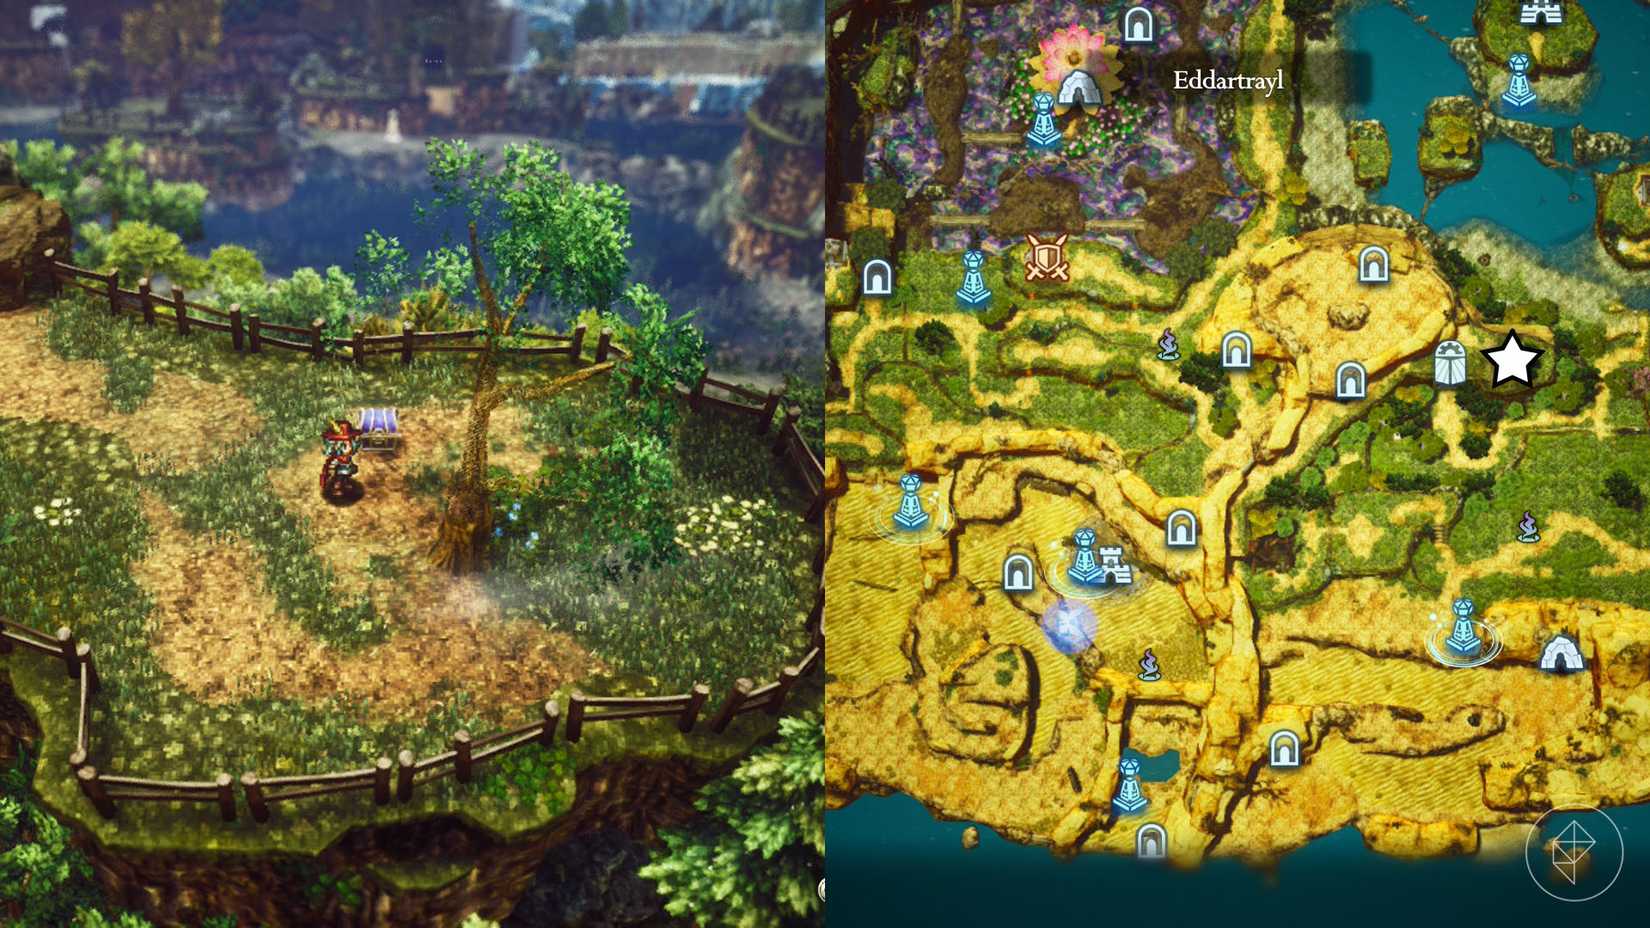
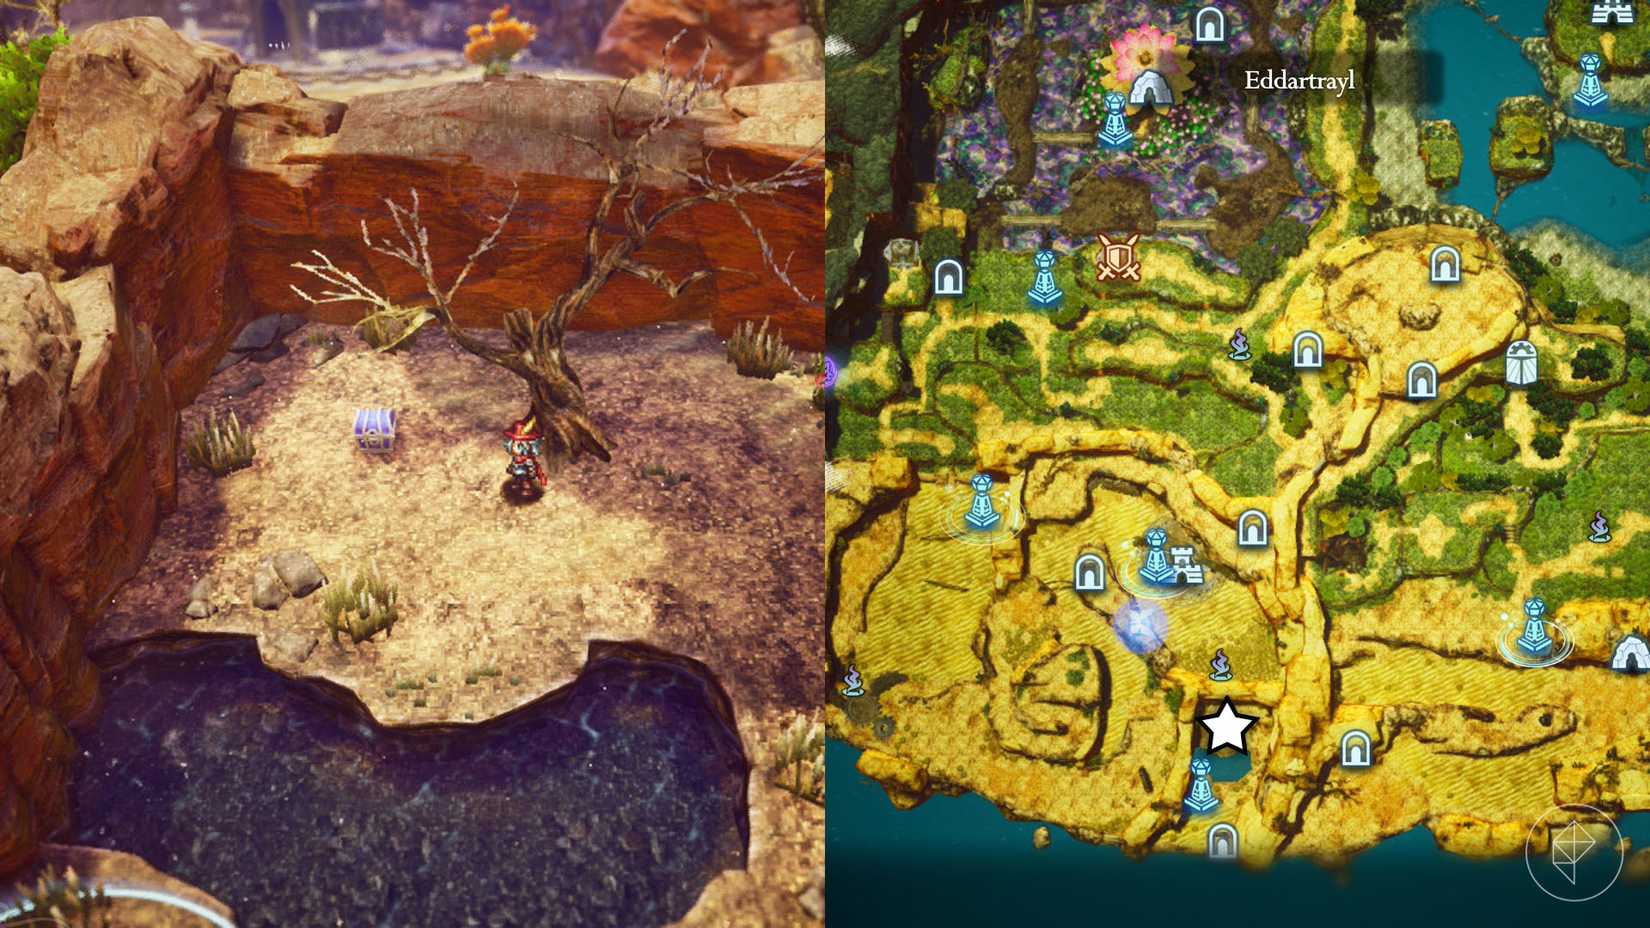
| Eddartrayl | Northern Chest | Found west of the Desert Exit in the Southern Caves. |
| Mist Ruins | Sublevel 2 | Hidden in a room on the eastern side of the second floor. |
| Western Fields of Flon | Secret Shortcut 1 | Requires Bombs; find the entrance southwest of the chest. |
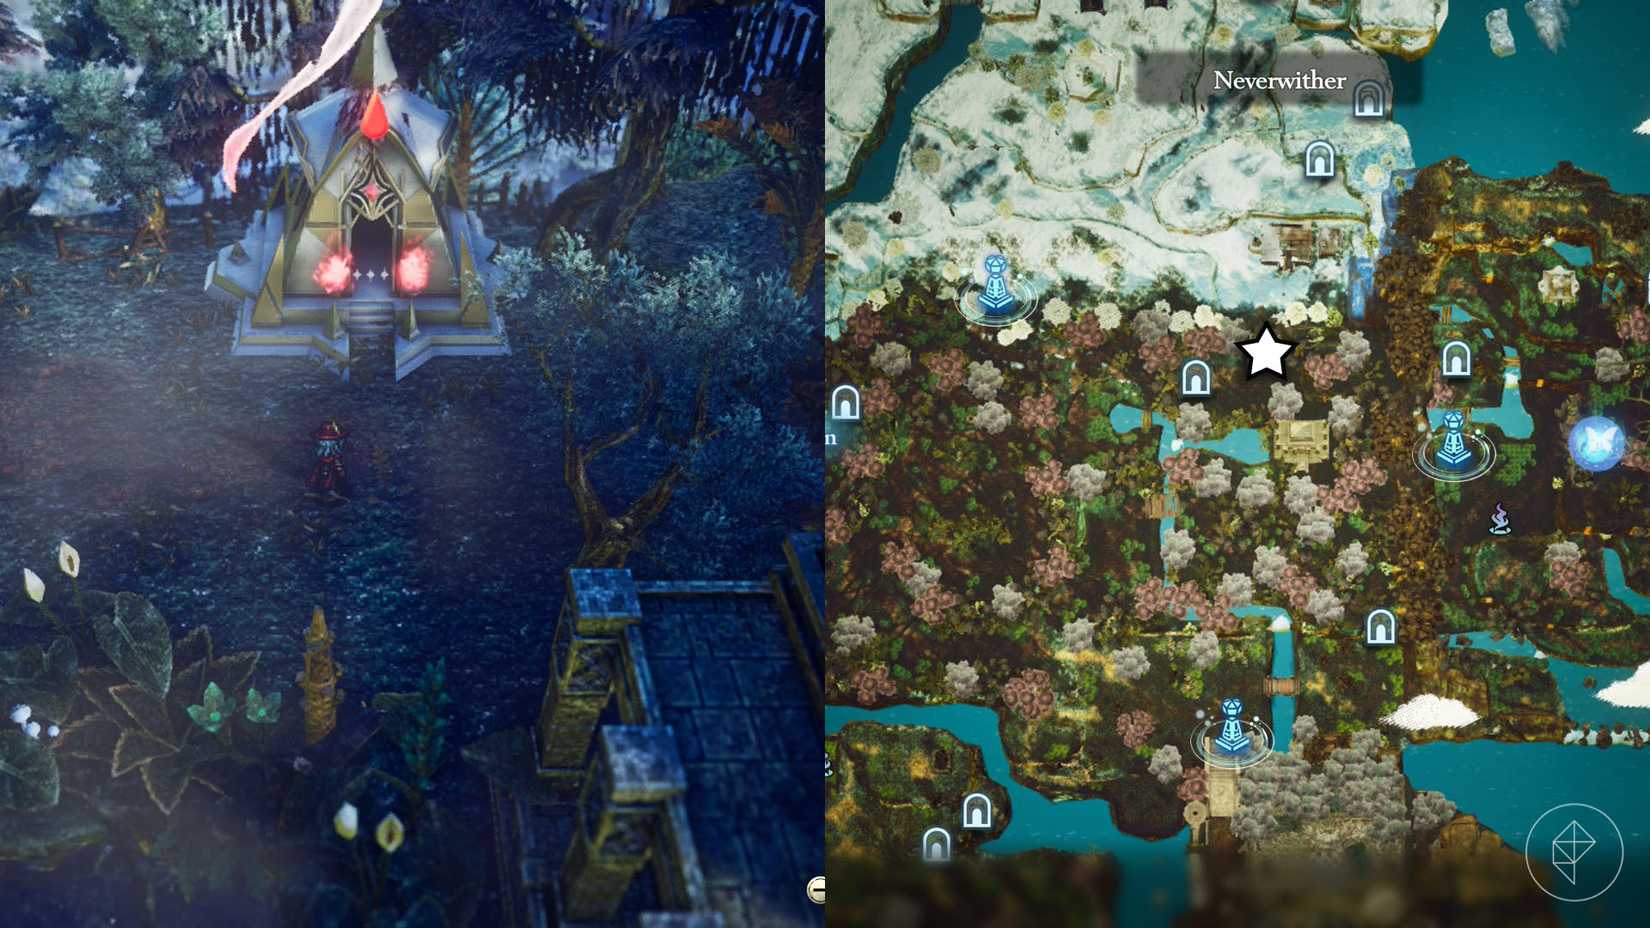
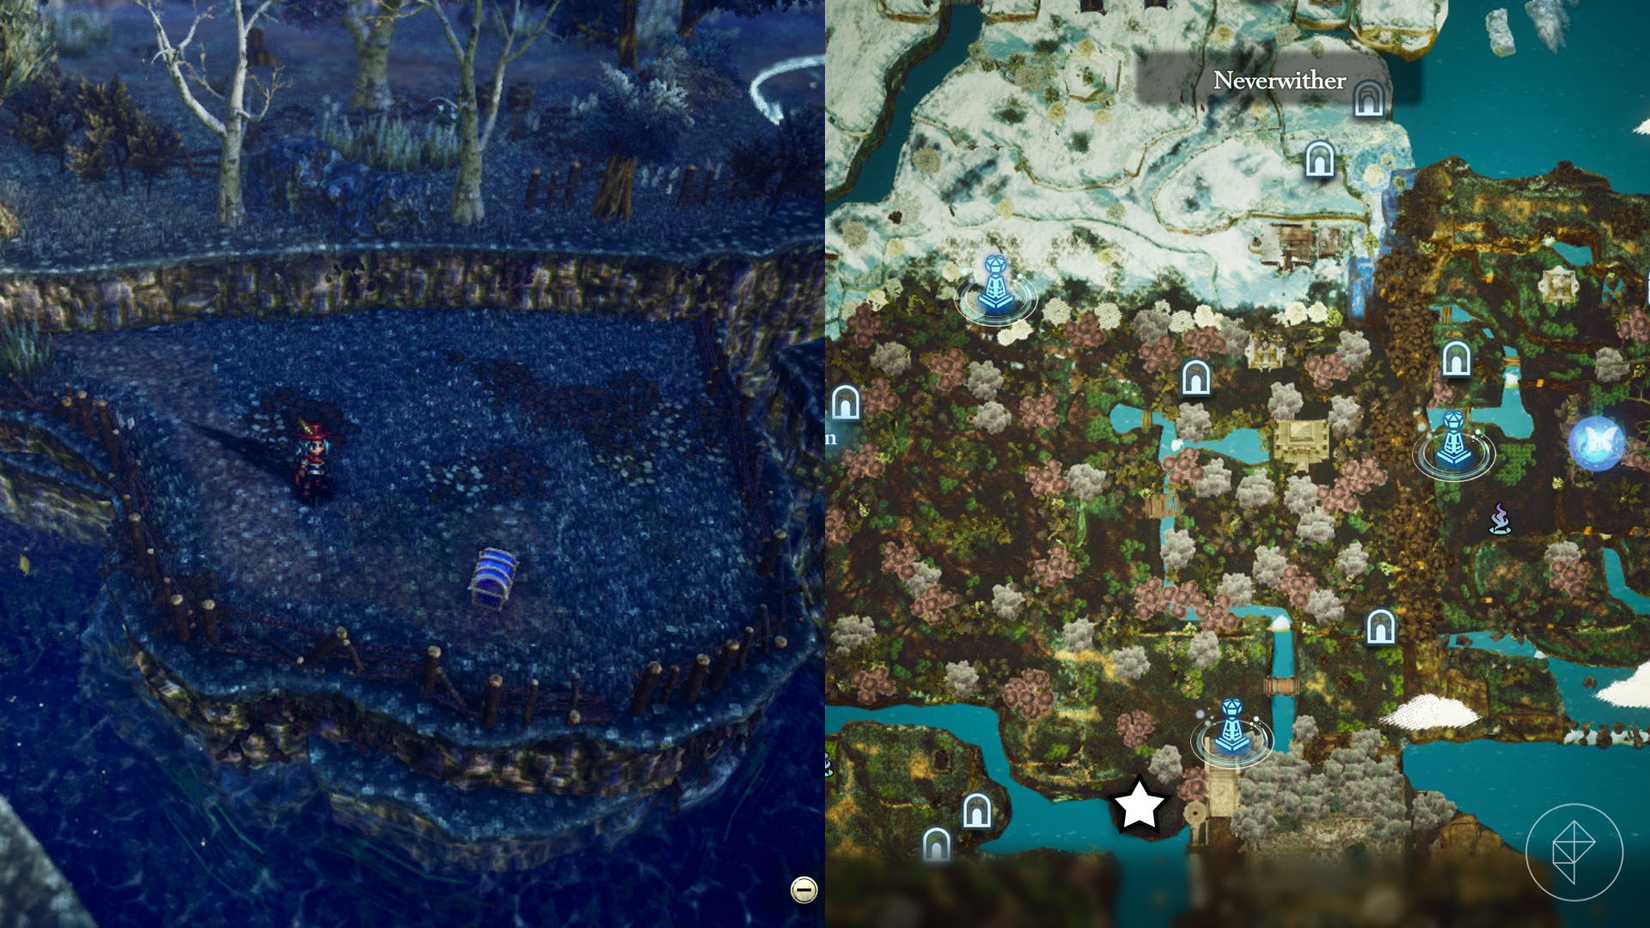
| Forest Ruins | Neverwither | Use plant trampolines on level two to reach the upper floor. |
| Westerea | Shrine of Life 9 | Found southwest of the Rainbow Lotus dungeon. |
| Westerea | Monster Trail 3 | Use Secret Shortcut 6 to reach the chest north of the dungeon. |
| Westerea | Monster Trail 2 | Hidden in poisonous vegetation northeast of the dungeon. |
| Geared Ruins | Level 2 | Jump across the gear-bridge on the east side. |
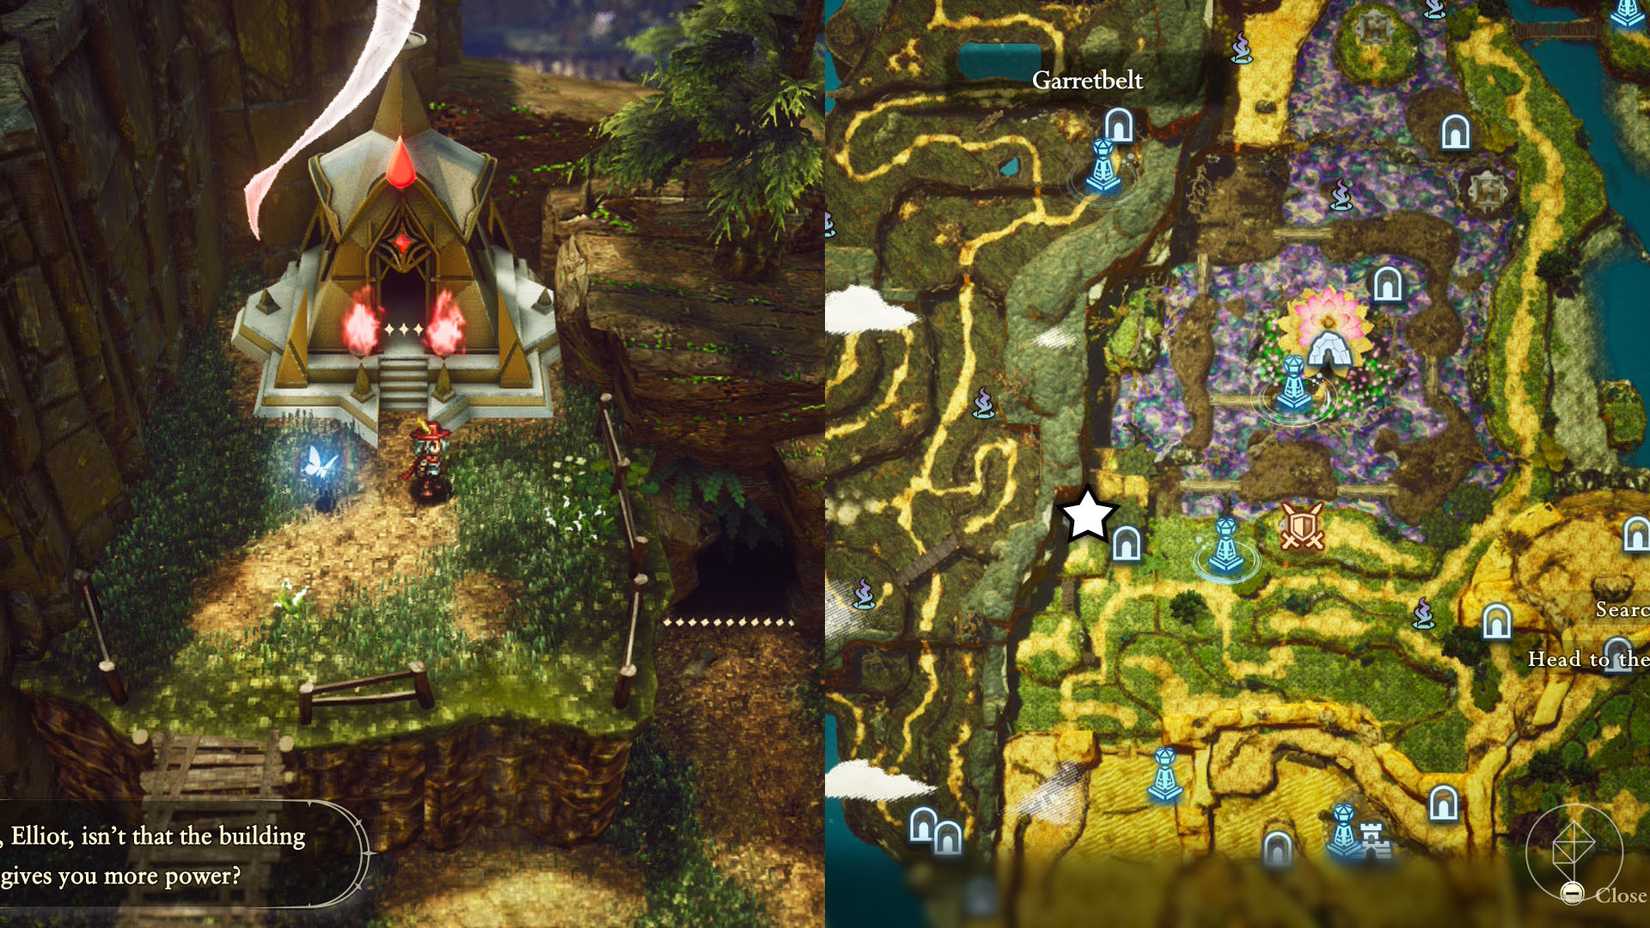
| Garretbelt | Mount Phoenix | Drop off the edge south of the "Approach" guidepost. |
| Westerea | East of Northern Tower | Found east of the guidepost. |
| Whiterea | Secret Shortcut 3 | Located near the riverbank. |
| Whiterea | Shrine of Life 5 | Requires use of Secret Shortcut 3 to reach the northern area. |
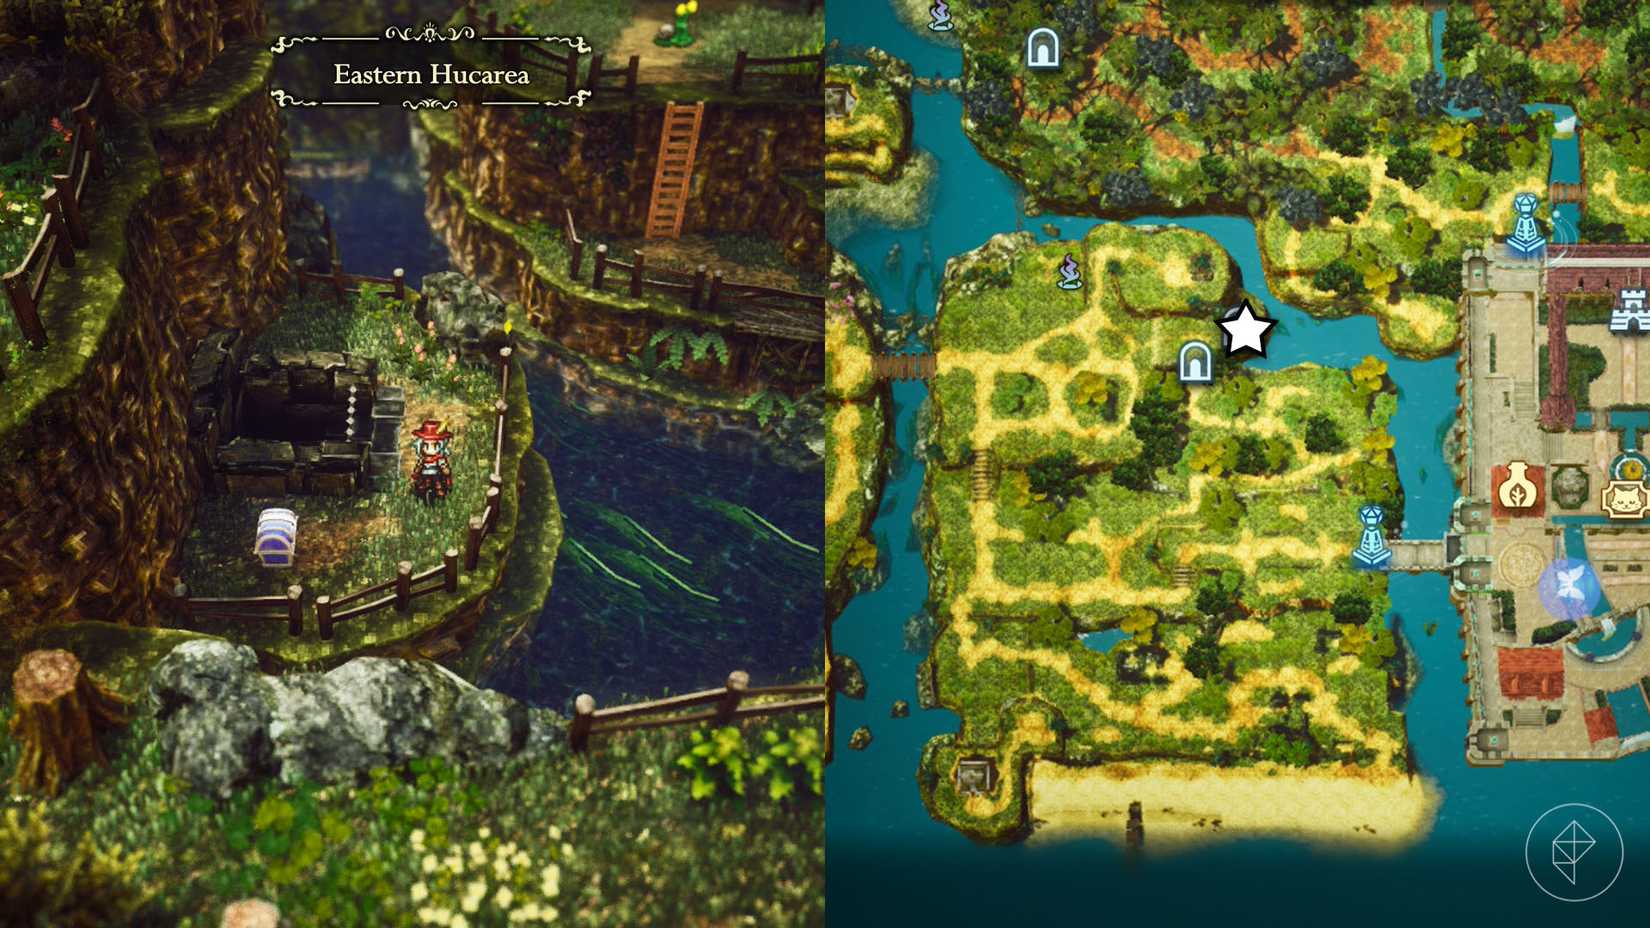
| Neverwither | Southeastern sector | Accessible in the open landscape. |
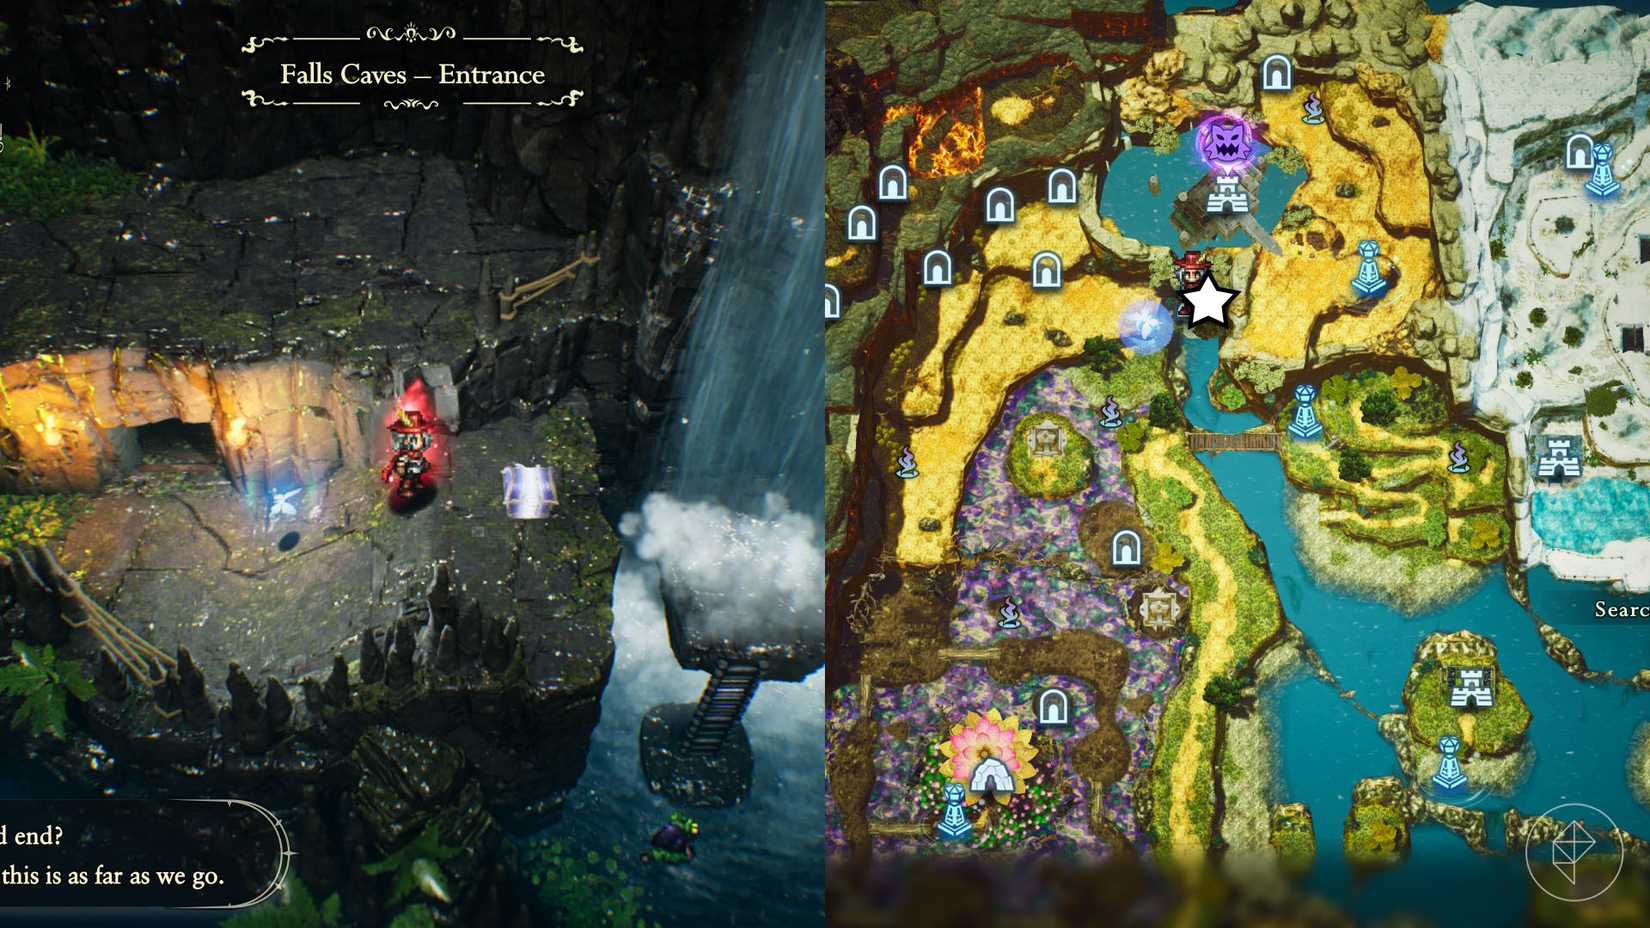
| Westerea | Falls Caves | Swim north from the left side of the river near the Northern Tower. |
II. The Age of Reconstruction (18 Shards)
As the world begins to change, so do the challenges. This age introduces 18 shards. Mastering the "Dive" ability is mandatory here, as many of these are submerged or located in underwater grottoes.
Key locations include the Northern Caverns in Whiterea, where precision with the spear is required to clear obstacles, and the Water Ruins, which serve as a central hub for several difficult-to-reach chests.
III. The Age of Magic (13 Shards)
In the Age of Magic, the game begins to test your mastery of spell-casting. Abilities like the "Vacuum" spell become necessary to interact with environmental hazards.
Strategy Tip: When navigating the Ice Ruins, don’t rush. The shards here are often placed in high-traffic combat zones. Clear the room of enemies before attempting to move mirrors or activate orbs, as interrupting the sequence will reset the environmental state.
IV. The Age of Budding (13 Shards)
The final stretch. These 13 shards are the most difficult to acquire, often requiring a combination of every skill you have learned to date. The Desert Caves and the Dragonpillar contain the final remnants of life energy. By this point, your health pool should be nearing its 20-Tear limit.
Supporting Data: The Efficiency of Collection
Data compiled from player progress tracking suggests that the "sweet spot" for shard collection occurs between the middle of the Age of Reconstruction and the start of the Age of Magic. Players who wait until the end-game to collect all shards often find themselves struggling with the base health pool during the more difficult boss sequences in the mid-game.
Furthermore, the game’s design intentionally places "Shards of Life" as bait for secret paths. If you see a chest that appears unreachable, look for a nearby breakable wall or a ledge that requires a "Warp" or "Dash" ability.
Implications for Gameplay: The "Glass Cannon" vs. "Tank" Meta
The inclusion of 60 total Shards of Life allows for significant customization of Elliot’s playstyle. Players who prioritize finding all shards early essentially adopt a "Tank" meta, where they can survive multiple hits from high-level bosses. Conversely, those who ignore the shards essentially play the game in "Hard Mode," where any mistake could lead to an instant respawn.

This design choice by the developers at Claytechworks and Square Enix highlights the game’s focus on player agency. The game does not force you to become tanky, but it provides the tools for those who want to mitigate the frustration of trial-and-error gameplay.
Official Perspective and Community Feedback
Since the release of The Adventures of Elliot, the community has been vocal about the satisfaction found in these "treasure hunts." In a recent developer Q&A, the design team noted that the placement of the shards was intended to teach players the geography of the world. "We didn’t want the health upgrades to be automatic," the lead developer stated. "We wanted the player to feel like they earned their survival through exploration."
Community forums and speed-running groups have also praised the inclusion of the "Secret Shortcuts," which reward players for remembering the layout of previous areas. The synergy between the game’s narrative progression and its exploration mechanics ensures that the world feels interconnected rather than segmented.
Conclusion: A Path to Mastery
Whether you are a casual player looking to enjoy the story or a completionist aiming for 100%, the Shards of Life represent the most rewarding aspect of The Adventures of Elliot. By systematically clearing each age of its hidden treasures, you ensure that Elliot is prepared for whatever the Millennium Tales throw his way.
Keep this guide bookmarked as you traverse the maps. Remember: the difference between a successful quest and a premature Game Over is often just one, small, red shard. Happy hunting, and may your health bar always be full.
Ed. Note: If you are viewing this guide on a mobile device, please swipe left or right on the tables above to ensure you have full visibility of the locations and descriptions provided.


