

Master the Melons: The Ultimate Guide to Selecting, Processing, and Preserving Watermelon
Watermelon is the undisputed icon of summer. With its vibrant crimson flesh, refreshing sweetness, and high water content, it is a staple of backyard barbecues, poolside snacks, and family picnics. However, for many home cooks, the sheer size and structural integrity of a whole watermelon can be intimidating. Moving from a heavy, round fruit to uniform, bite-sized cubes often feels like a labor-intensive chore rather than a culinary delight.
The reality, however, is that breaking down a watermelon is a skill that, once mastered, becomes a rhythmic and highly efficient process. By utilizing the correct tools and a systematic approach, you can transform a formidable fruit into ready-to-eat cubes in a matter of minutes.
The Anatomy of the Perfect Watermelon: Selection is Key
Before you ever put a knife to the rind, the quality of your experience is dictated by your selection at the grocery store or farmers’ market. Unlike stone fruits or bananas, which continue to ripen on your kitchen counter, watermelons are non-climacteric. This means that once a watermelon is harvested from the vine, its sugar content and texture are locked in; it will not ripen further.
Selecting a suboptimal watermelon leads to the dreaded "dry, unsweet disappointment." To ensure you are bringing home the peak of the harvest, look for these indicators:
- The Field Spot: Look for a creamy, buttery yellow patch on the underside of the melon. This is where the fruit rested on the ground while ripening. A white or greenish-white spot often indicates the melon was picked too early.
- The Sound Test: When you tap or flick the side of the melon with your knuckles, it should produce a deep, resonant, hollow sound. A dull thud can suggest the fruit is overripe or mealy, while a high-pitched, metallic ping may indicate it is underripe.
- Weight: A high-quality watermelon should feel heavy for its size. This indicates a high water content and dense, juicy flesh.
- Uniformity: While lopsided melons can be delicious, those with significant dents, soft spots, or bruising should be avoided, as these are gateways for bacteria and indicators of internal structural failure.
The Professional Approach: A Step-by-Step Guide to Cubing
The process of cubing a watermelon is less about strength and more about creating stable, flat surfaces. Follow this professional workflow to ensure safety and consistency.
Step 1: Establishing Stability
Place your watermelon on a stable, non-slip cutting board. Using a sharp serrated bread knife or a long, ultra-sharp chef’s knife, slice off the top and bottom "poles" of the watermelon. By creating two flat surfaces, you eliminate the possibility of the melon rolling during the subsequent cuts.

Step 2: Removing the Rind
Place the melon cut-side down on the board. Working from top to bottom, follow the natural curve of the fruit with your knife, slicing away the rind and the pale, fibrous white layer (the pith) until only the vibrant pink flesh remains.
Step 3: Vertical Slicing
With the rind removed, slice the remaining fruit into thick, vertical slabs. The thickness of these slabs will dictate the size of your final cubes.
Step 4: Creating the Cubes
Stack a few slabs at a time and slice them horizontally, then vertically, to create uniform cubes. This grid-cutting method allows you to process the entire fruit in significantly less time than traditional "wedging."
Tool Selection: Why Knife Choice Matters
The physical resistance provided by the thick, waxy rind of a watermelon is the primary barrier for most home cooks. A dull blade requires excessive force, which increases the risk of the knife slipping.
Professional chefs frequently recommend a long serrated knife. The saw-like teeth of the blade allow the knife to "bite" into the tough rind without requiring downward pressure, effectively gliding through the fruit. If you prefer a traditional chef’s knife, ensure it is freshly honed; a razor-sharp edge is safer than a dull one, as it requires less kinetic energy to penetrate the surface of the fruit.
Chronology of Consumption and Preservation
Once the watermelon is cubed, the clock begins to tick on its freshness. Understanding the timeline of storage is essential for maintaining the integrity of the fruit.
- Immediate Consumption: Watermelon is at its textural peak when served chilled immediately after cutting.
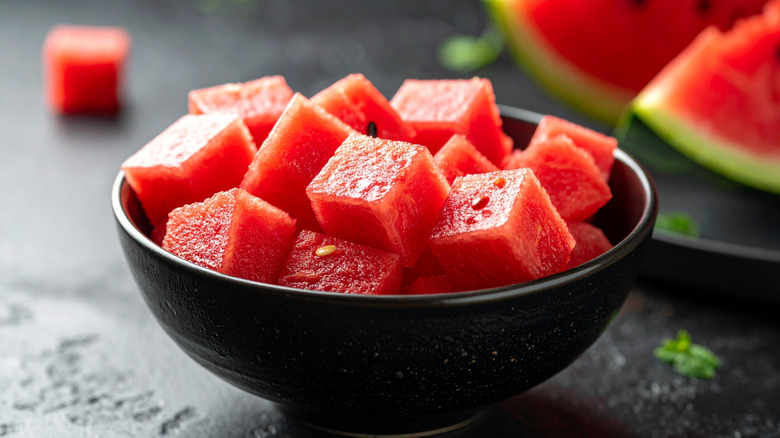
- Short-Term Storage (1-2 Days): Store cut cubes in a high-quality, airtight glass or BPA-free plastic container. Avoid leaving them in a bowl uncovered, as they will absorb the ambient odors of other refrigerator contents.
- Advanced Preservation (The Cooling Rack Hack): If you are prepping for a party, place your cubes on a cooling rack set inside a large bowl or container. This allows excess juice to drain into the bottom, preventing the cubes from sitting in a pool of liquid and turning mushy.
- The 5-Day Threshold: Under optimal refrigeration, cut watermelon generally maintains its structural integrity for up to five days. Beyond this point, the cells of the fruit begin to break down, resulting in a loss of crispness and a potential decline in flavor.
Creative Culinary Implications: Beyond the Bowl
Once you have mastered the cubing technique, the culinary applications for your watermelon are vast. One of the most popular trends in contemporary kitchens is the "partial freeze."
By placing your cubed watermelon in the freezer for 30 to 45 minutes before serving, you alter the cell structure slightly to create a slushie-like, crystalline mouthfeel without losing the core juiciness of the fruit. This is a perfect technique for hot summer afternoons or for incorporating into sophisticated mocktails and cocktails.
Furthermore, do not discard the rind. While the green exterior is tough, the white pith can be pickled. Pickled watermelon rind is a Southern delicacy that offers a crisp, tangy, and sweet profile that pairs beautifully with fatty meats or artisanal cheeses, effectively resulting in a zero-waste kitchen process.
Expert Perspectives on Food Safety
Health and food safety experts emphasize that while watermelon is a low-acid fruit, once the rind is breached, the risk of bacterial contamination increases. It is vital to wash the exterior of the watermelon thoroughly under cool running water before cutting. Because a knife passes through the rind and into the flesh, any dirt or bacteria present on the skin can be dragged into the edible portion of the fruit.
Official guidelines suggest that once a watermelon is cut, it should not remain at room temperature for more than two hours. If you are hosting an outdoor event, keep the watermelon on ice or rotate batches from the refrigerator to the serving table to ensure the internal temperature stays below 40 degrees Fahrenheit.
Conclusion
Cutting a watermelon is a rite of passage for the summer season. By moving away from the messy, haphazard wedge method and adopting a systematic, cube-based approach, you elevate the fruit from a "chore" to a convenient, high-quality snack. Whether you are prepping for a large-scale event or simply keeping a container in the fridge for a quick, refreshing bite, the key lies in the preparation—from the initial sound-test at the store to the precise, steady blade work on your kitchen counter. With these techniques, you ensure that your watermelon remains the highlight of your summer menu.


